Before you can do that though, you’d have to enable hardware virtualization on Windows 10.
Hardware Virtualization System Requirements
Windows 10 Pro or Enterprise 64-bit processor with Second Level Address Translation (SLAT) 4GB system RAM at minimum BIOS-level Hardware Virtualization support
Check Hardware Virtualization support
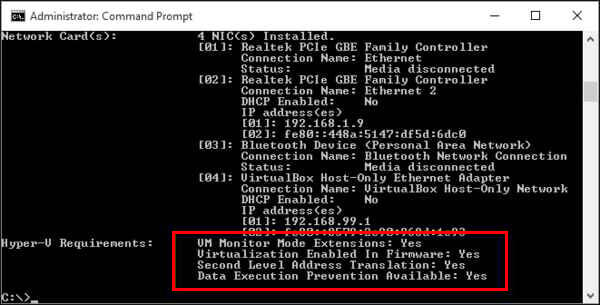
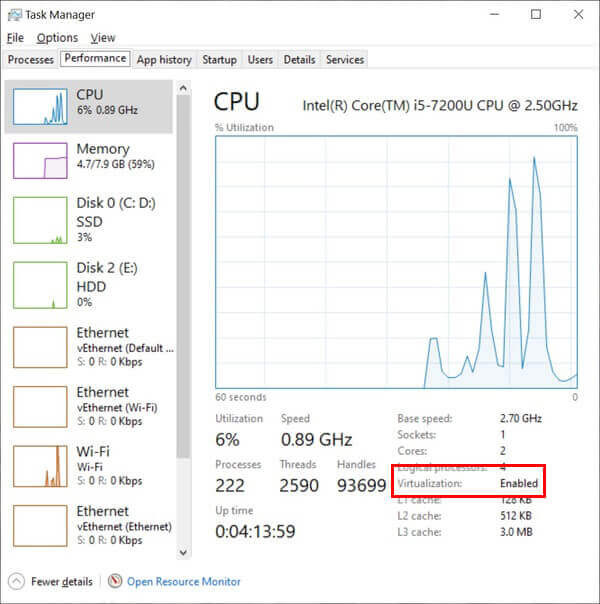
First of all, make sure your device supports hardware virtualization. You can also check that it is enabled in the BIOS or UEFI firmware settings. Alternatively, you can also see if Virtualization is enabled under the Performance tab of the Task manager.
The virtualization status will be in enabled mode if you check on the CPU performance screen. If it’s not, you’ll have to enable this in the BIOS or UEFI settings.
Enable Virtualization on PC BIOS Setting
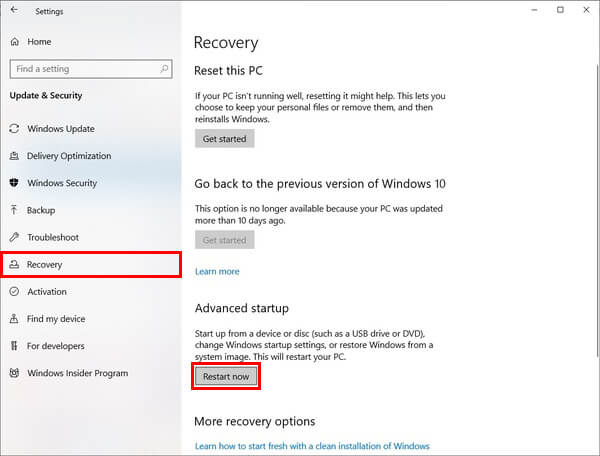
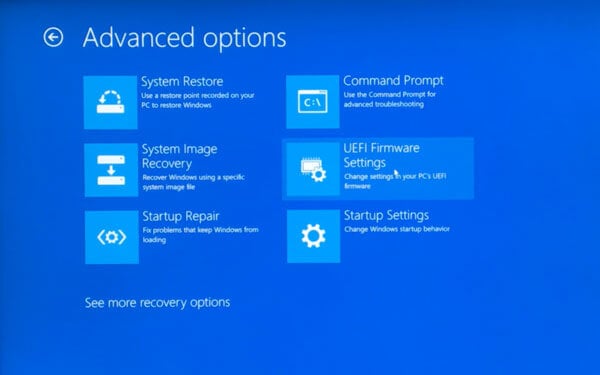
Every PC has a different version of BIOS screen and settings. Also, the steps to steps to enable virtualization from the BIOS depends on the PC manufacturer. Normally, BIOS settings can be accessed using the function keys (F1, F2, F3, F10, or F12) during boot. On some PCs, it’s the ESC, or Delete key. Moreover, the keys are different from manufacturer to manufacturer and even among devices from the same manufacturer. Still, if you don’t already know the correct key for your machine, Google it. When you boot your PC, tap the key about twice per second as soon as the screen turns on. An easier and more universal way is to do this from the Windows 10 Settings.
This method only works if you use UEFI-boot. And this is also a setting that can be changed from the BIOS. If you don’t know this, you don’t have to worry about it. All Windows PCs ship with UEFI boot enabled by default.
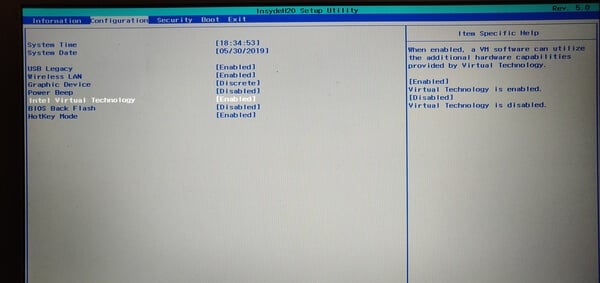
Look for something like an Advanced menu or tab. You’ll most likely find the setting you need to turn on under this. In addition to all the other things that can be different, this can also be labeled differently. It could be Advanced Mode, or simply Configuration like it is on my Lenovo Ideapad. Finally, look for the setting which has Virtualization is its name and turn it on. Sometimes it’s named completely vaguely. For instance, Vanderloop. Depending upon your processor and other factors, these are the names commonly used.
Intel Virtualization Technology, AMD-V, Hyper-V VT-X Vanderpool SVM
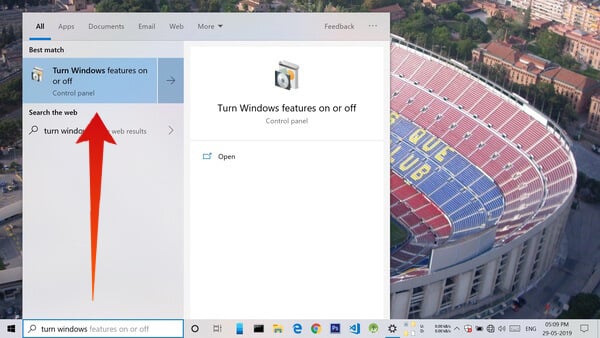
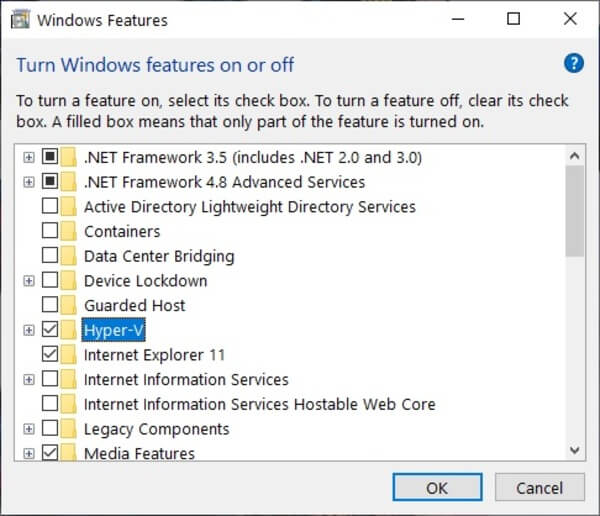
Enable Hyper-V Virtualization in Windows 10
Now that virtualization support is enabled in the BIOS, enable it on Windows 10.
Advantages of Windows Virtualization
Windows 8 was the first ever Windows version to natively support Hardware virtualization. Consequently, Windows 10 also supports it natively. But the platform has gained many features since then. This includes features like Enhanced Session Mode, high fidelity graphics, USB redirection, Linux secure boot, etc. With Windows virtualization, you can test apps inside a virtual machine without compromising your main system. We’ve already mentioned that at the start. And the new Windows 10 May 2019 update actually has a built-in feature that lets you do that. They call it Windows Sandbox. Virtualization also allows you to install a Linux shell on Windows. For instance, Ubuntu, Debian, Kali Linux, etc. are available from the Microsoft Store. Not only can you then use the powerful Linux terminal and commands but also the Linux GUI. One can even use a full-blown Linux desktop on Windows, although that’s not quite practical. My Lenova Ideapad 330 niot applicable
Δ